
A School Pupil's Work Experience Diary (Part 2)
Avani - My Experience at Take One TV
I have just finished Year 11 at a secondary school in South Bucks and looked locally for a media company to gain some work experience. Karen, the director at Take One TV was happy to help.
Day Three
Today I added the Road Safety PowToon to Take One’s You Tube channel, once I’d made the small changes that Karen had asked for. I had posted my own YouTube videos in the past so I had no trouble adding a description and thumbnail to the video.
I went on to make 3 video animations, based on the topic of Planet Earth. Again, I planned out the storyboards just to give me an idea on how I wanted them to look. This time, I found PowToon a lot easier to use as I was used to it. At first, I had made one long PowToon which was around 3 minutes. Usually, a PowToon should be around 60 to 90 seconds. Therefore, I made 3 separate PowToon’s on Planet Earth: Our Earth, How to recycle and Saving the Earth.
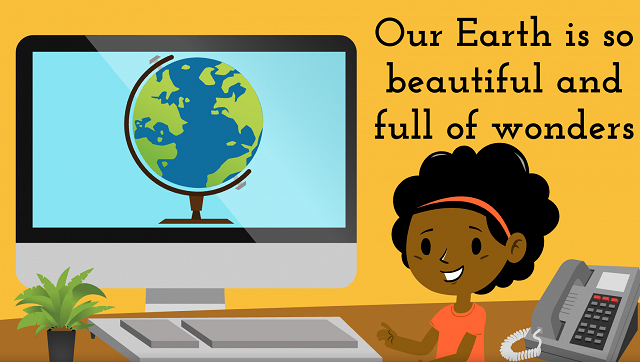
The first one (Our Earth) was about how people are destroying our world by littering, pollution and more. It taught kids 3 main ways they could make the world a better place. The first slide was an intro on the topic where there was an animation of a cartoon Earth (this was to set the scene). Also, I added a subtitle just as a little hint to what the video regarded. Like the previous one, I used a child as a presenter (called Michelle) who was introduced on the second slide, to make the presentation more child-like and friendly. Within the text, I added a word by word transition only to make it seem more interesting and different. On the third slide, I created a fun-fact profile for the Earth. This was to allow the kids to understand a little bit of background knowledge about our planet in a fun way.
Then I introduced them to the beautiful places of the world but then contrast those pictures with damaged images of the same places. This was to make them face reality and feel sad about how people are damaging the world. I portrayed this on a computer so it looked as if it was a slideshow playing on the screen. Moreover, on the next slide it asks for ‘YOUR’ help in a big and bold text which makes it stand out. The word ‘your’ can make kids feel special and more motivated to help. Later it introduces 3 ways that they could help save the Earth: recycle, save energy and to walk. I introduced them one at a time so the audience had more time to view it and take in the information. The pictures are also big and bold to make them stand out and more memorable. Then it ends with the OK Our Kids logo as the earth as a background so it can fit in with the topic.
Within the PowToon as a whole, I added smooth transitions to make the video flow better and to make it more exciting. I added fun music to accompany the video so it wouldn’t be so boring.
Take a look at the finished video here
Day Four
Today I moved on to the next Planet earth PowToon: How to Recycle. This taught kids how to recycle effectively.
I opened the PowToon with the same intro as the previous Planet earth one just to show that it’s in the same topic. However, I put a different subtitle also showing how this video is a subtopic to the Planet Earth topic. I also didn’t introduce Michelle like last time as there was no need to introduce her again. Instead I jumped right in to the explanation. For most of these slides I picked a background that looked like a street because it gave the impression of places you would find rubbish and bins. The second slide shows a banner at the top was made green to represent the typical colour associated with recycling and the same with the bullet point. The font was left very simple and bold therefore making it easier to read. I also made it big enough so all devices can read it with ease.
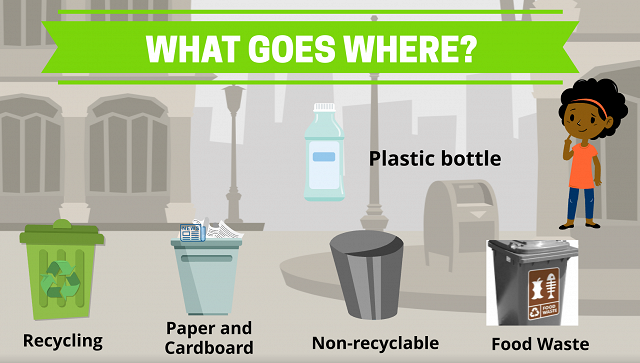
On the slides, I introduced each type of bin and what it’s used for. There were 4 bins: recycling bin, paper and cardboard bin, non-recycling bin and a food waste bin. The layout of these slides was exactly the same, I used a child-like font to make it seem more playful and the positioning of the bins and the text were exactly the same. After explaining all the bins, I created a little game of ‘What goes where?’ which shows different types of wasted products and the bin they must be thrown away into. For example, a plastic bottle would go into the recycling bin. I thought this mini game would be a clear and fun way kids can learn about throwing away their rubbish. Like the previous ones, I ended with a ‘Well Done’ slide and the OK Our Kids logo.
Within the PowToon as a whole, I added smooth transitions to make the video flow better and to make it more exciting. I added fun music to accompany the video so it would be more entertaining.
Take a look at the finished video here.
Day Five
I started my last Planet Earth one: Saving the Earth. This one explains quick and easy ways to help save the planet.
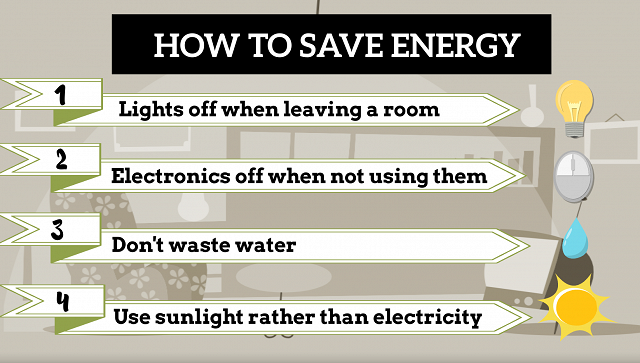
I began the PowToon with the same intro as the previous Planet earth one just to show that it’s in the same topic. However, I put a different subtitle also showing how this video is a subtopic to the Planet Earth topic. I also didn’t introduce Michelle like last time as there was no need to introduce her again. In this PowToon, I had 3 main topics: how to save energy, better ways to travel and throw away your rubbish. On the ‘Save energy’ slide, I put a living room as a background as it would be a place where you could save energy to most. I made the text slide into the frame along with a picture popping up next to it. The text was made very bold to make it easier to read and stand out.
The next slid was ‘Better ways to travel’ where it explains different ways to travel rather than being in vehicle to reduce levels of pollution. The heading was made in a 3D effect to make it stand out and look cooler. On this slide I mentioned 4 different ways of travelling: walking, cycling, taking the bus or catching the train. I made each different way of travelling slide in from the left and out to the right like a slideshow.
My last topic was ‘Throw away your rubbish’, which showed how to pick up your own rubbish and throw it in a bin. The background was a park to which I chose as it is a typical place where litter is thrown. I scattered some animated rubbish across the park and then transitioned it into the bin to show where the rubbish should be (in the bin).
Within the PowToon as a whole, I added smooth transitions to the slides and the text to make the video flow better and to make it more exciting. I added fun music to accompany the video so it would be more entertaining.
Then as an outro I showed the OK Our Kids logo with contact details as usual.
Once I completed those Planet Earth PowToon’s, I uploaded each of them to YouTube the same way I did for the Road safety one.
Take a look at the finished video here
Finally, I got started on my last PowToon which was the ‘How to say NO’ explanation video.
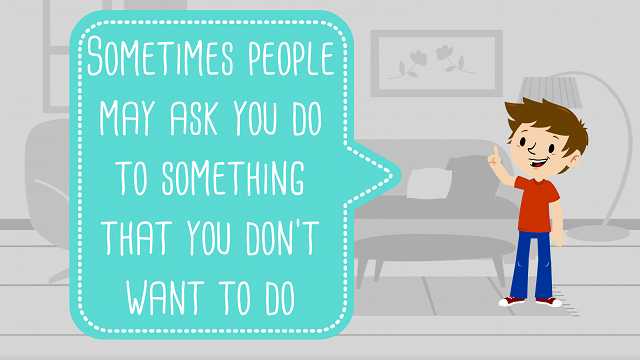
My introduction slide was a stop hand sign along with 2 crosses which gave the impressions of stop or no which is what I was aiming for. The title in all caps and bold ‘How to say NO’. Like usual I would introduce a child presenter and this time their name was Oliver. On the third slide there is quite a bit of text as this topic is very serious so kids need to understand as much as they can in this short video. It tells kids how adults can manipulate kids into doing horrible things but explained in a child-friendly way so they can understand it well.
In this PowToon there is one main rule that is repeated throughout, SAY NO. This phrase is easy to remember and to understand so kids can use it in situations without a thought. It gets the message stuck inside their head so they won’t forget. During the slides, the text saying ‘SAY NO’ is in all caps and in a big size to make it stand out even more. I then included DO’s and DON’Ts towards the end to make them understand what to do in a situation and what not to do. At the end I added links with easy phone numbers so in case anything happens to a child they know who to call.
Within the PowToon as a whole, I added fun transitions to the slides and the text to make the video flow better and to make it more exciting. As usual I added fun music to accompany the video so it would be more entertaining.
As usual I ended with the OK Our Kids logo.
Take a look at the finished video here.
Stay tuned for Avani's continued blog in part 3.


